
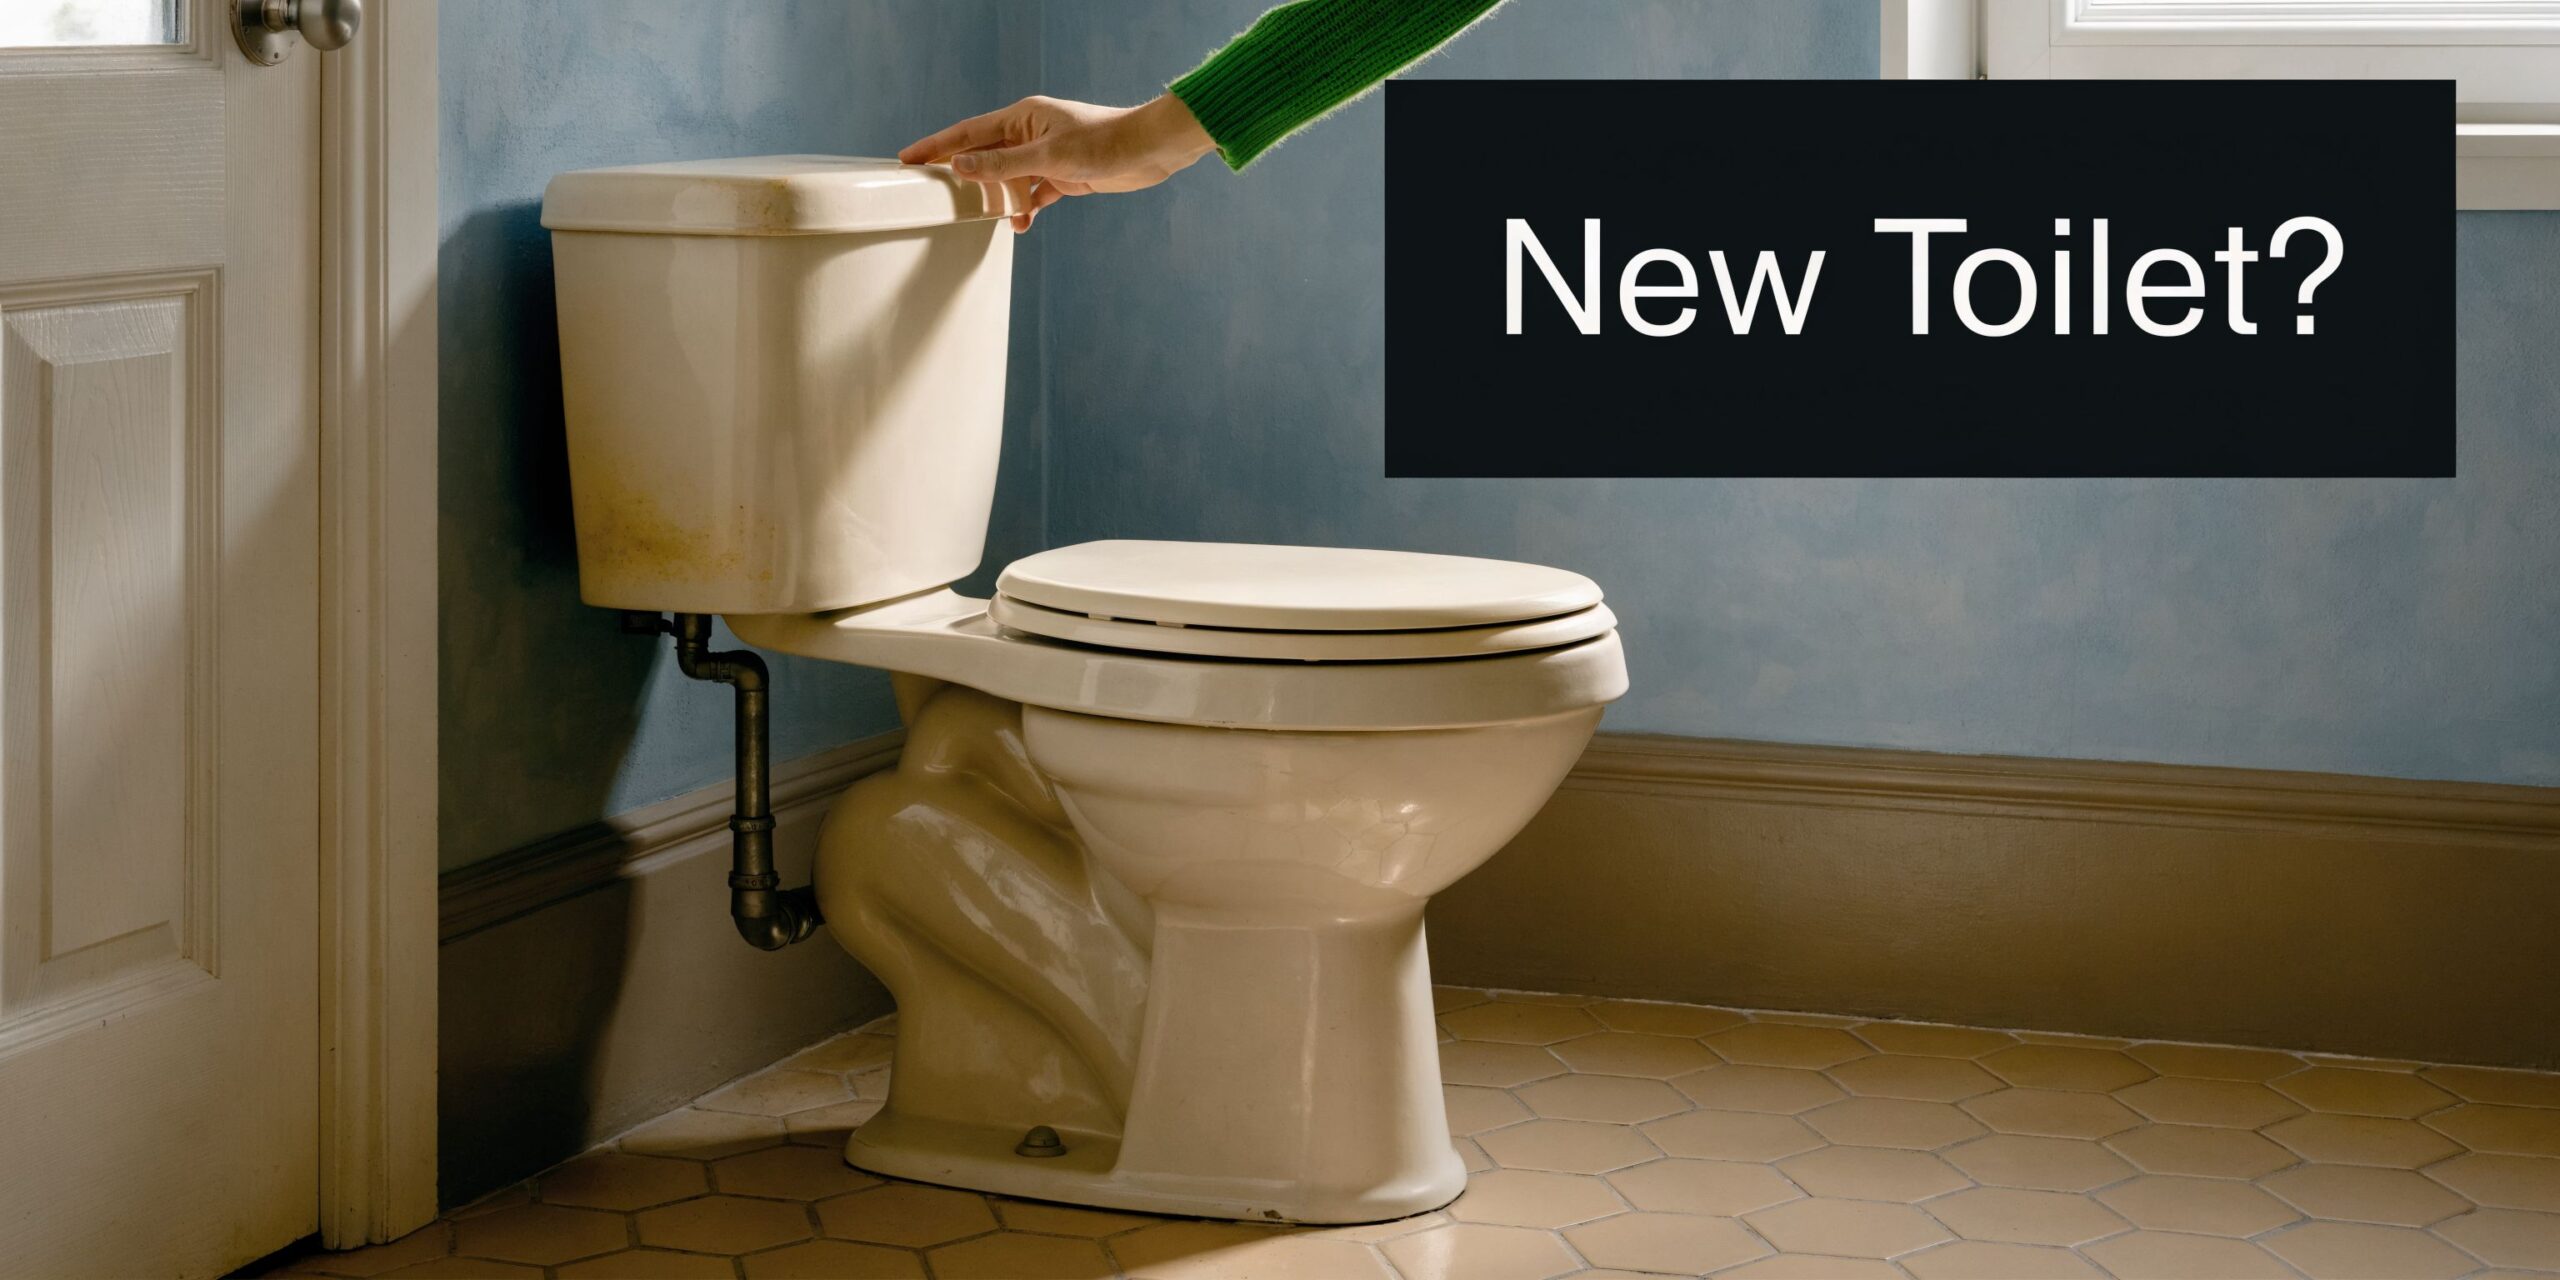
Planning Your New Toilet What's the Actual Cost
A lot of people start with the same assumption. The old toilet comes out, the new one goes in, and the invoice should be straightforward.
Sometimes that is true. Sometimes it is not.
The problem is that homeowners usually do not see the condition of the flange, the subfloor, the shutoff valve, or the drain alignment until the toilet is removed. That is why two quotes for the same bathroom can look very different. One contractor may be pricing a direct replacement. Another may be assuming they will need to correct old plumbing or address code-related issues.
One overlooked part of the conversation is DIY risk. According to the Angi-based data provided for this brief, DIY installs fail within 6 months in 25% of cases, compared with a 5% rate for professional installs, and those failures can include leaks or flange damage costing $500 to $2,000 to correct (Angi toilet installation cost article). That is the hidden math behind a lot of “money-saving” installs.
Why averages can mislead
Averages are useful as a starting point, not a promise.
If your project is a same-location replacement in a newer home with solid flooring and a healthy shutoff valve, the cost to install a toilet can stay close to the baseline. If the toilet sits over an older flange, if the floor has softened from a slow leak, or if you want the toilet moved for a remodel, the price jumps because the work changes.
A toilet quote is only as accurate as the assumptions behind it. Ask whether the price includes removal, disposal, a new wax ring, new supply line, shutoff-valve replacement if needed, and any flange correction.
That is the practical way to think about this project. Not “what is the cheapest toilet install online,” but “what work does my bathroom need?”
Decoding the Standard Toilet Installation Cost
A standard toilet replacement often looks simple until the old fixture comes up. On paper, the national average is straightforward. According to HomeAdvisor’s 2025 to 2026 cost data, the average cost to install a new toilet is $374, with a typical range of $224 to $533, including the fixture and professional labor (HomeAdvisor toilet installation cost data).
That baseline helps. It does not remove uncertainty.
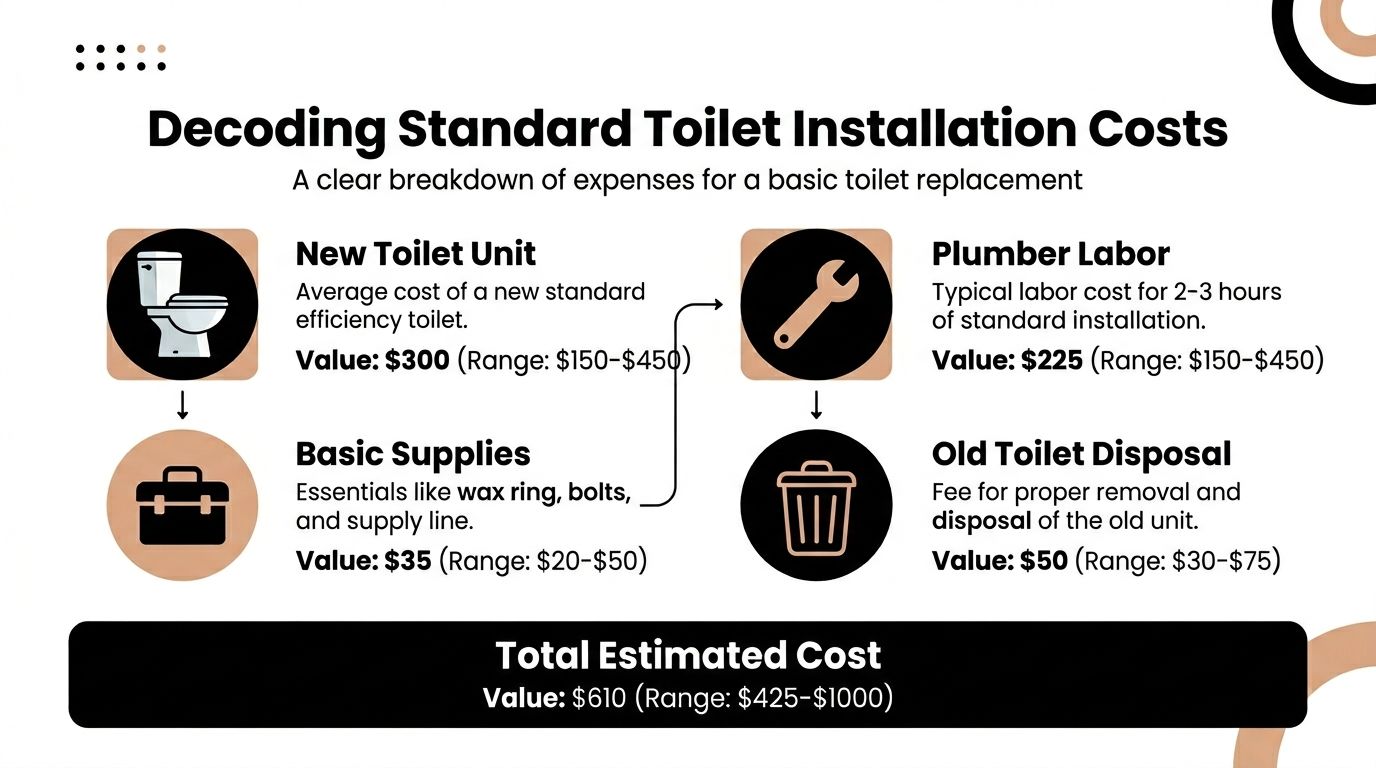
In projects, the total usually breaks into three buckets: the toilet you choose, the labor required to set it correctly, and the small parts or corrections that only show up once the installer starts work. Homeowners tend to focus on the fixture price. Installers focus on whether the flange is sound, the shutoff valve works, the floor is solid, and the bowl can be set without rocking.
The fixture cost
Fixture choice changes the budget fast. HomeAdvisor’s figures put a standard two-piece toilet at about $375, a one-piece model around $800, a wall-mounted toilet around $700, and an upflush model at $1,000 or more. Dual-flush toilets also cost more up front, with that same dataset putting them at about 25% more, or roughly $500.
That does not mean the cheapest toilet is the best value. A lower-cost bowl with weak glazing, harder-to-find parts, or poor trapway performance can cost more in callbacks and frustration than a midrange model that installs cleanly and flushes well for years. If water use is part of the decision, it helps to understand how a 1.6 GPF toilet performs and saves water.
The labor cost
Labor is where homeowners see the biggest spread between quotes. HomeAdvisor lists plumber labor at $180 to $490 per hour, depending on region and experience. For a direct replacement, that labor usually covers removal of the old toilet, inspection of the flange area, setting the new bowl, reconnection of the supply line, leak testing, and cleanup.
The important trade-off is not hourly rate alone. It is whether the quote includes the steps that prevent failures later. A lower number can still be expensive if it leaves out disposal, a new supply line, flange correction, or shutoff replacement when the old valve is frozen or corroded.
SouthRay handles that uncertainty by pricing around the actual scope rather than forcing every install into a generic allowance. For homeowners already planning a larger bathroom update, clear package pricing and 3D previews make it easier to see what is included before demolition starts.
The small items that are not small
The hidden costs on toilet installs are usually modest by themselves. Together, they are what push a project past the number a homeowner expected.
HomeAdvisor’s cost guide lists common add-ons such as wax ring replacement at $50 to $200, valve swaps at $50 to $150, and pipe work at $70 to $700. Those line items are easy to dismiss until one fails. A bad seal can stain finished flooring. A weak shutoff valve can turn a quick install into an emergency water-control problem. Minor pipe corrections can be the difference between a toilet that works well and one that clogs, rocks, or leaks.
For a plain replacement, $300 to $600 is still a practical working budget. If the existing toilet has been wobbling, leaking, or sitting on older flooring, use that range as a starting point, not a promise.
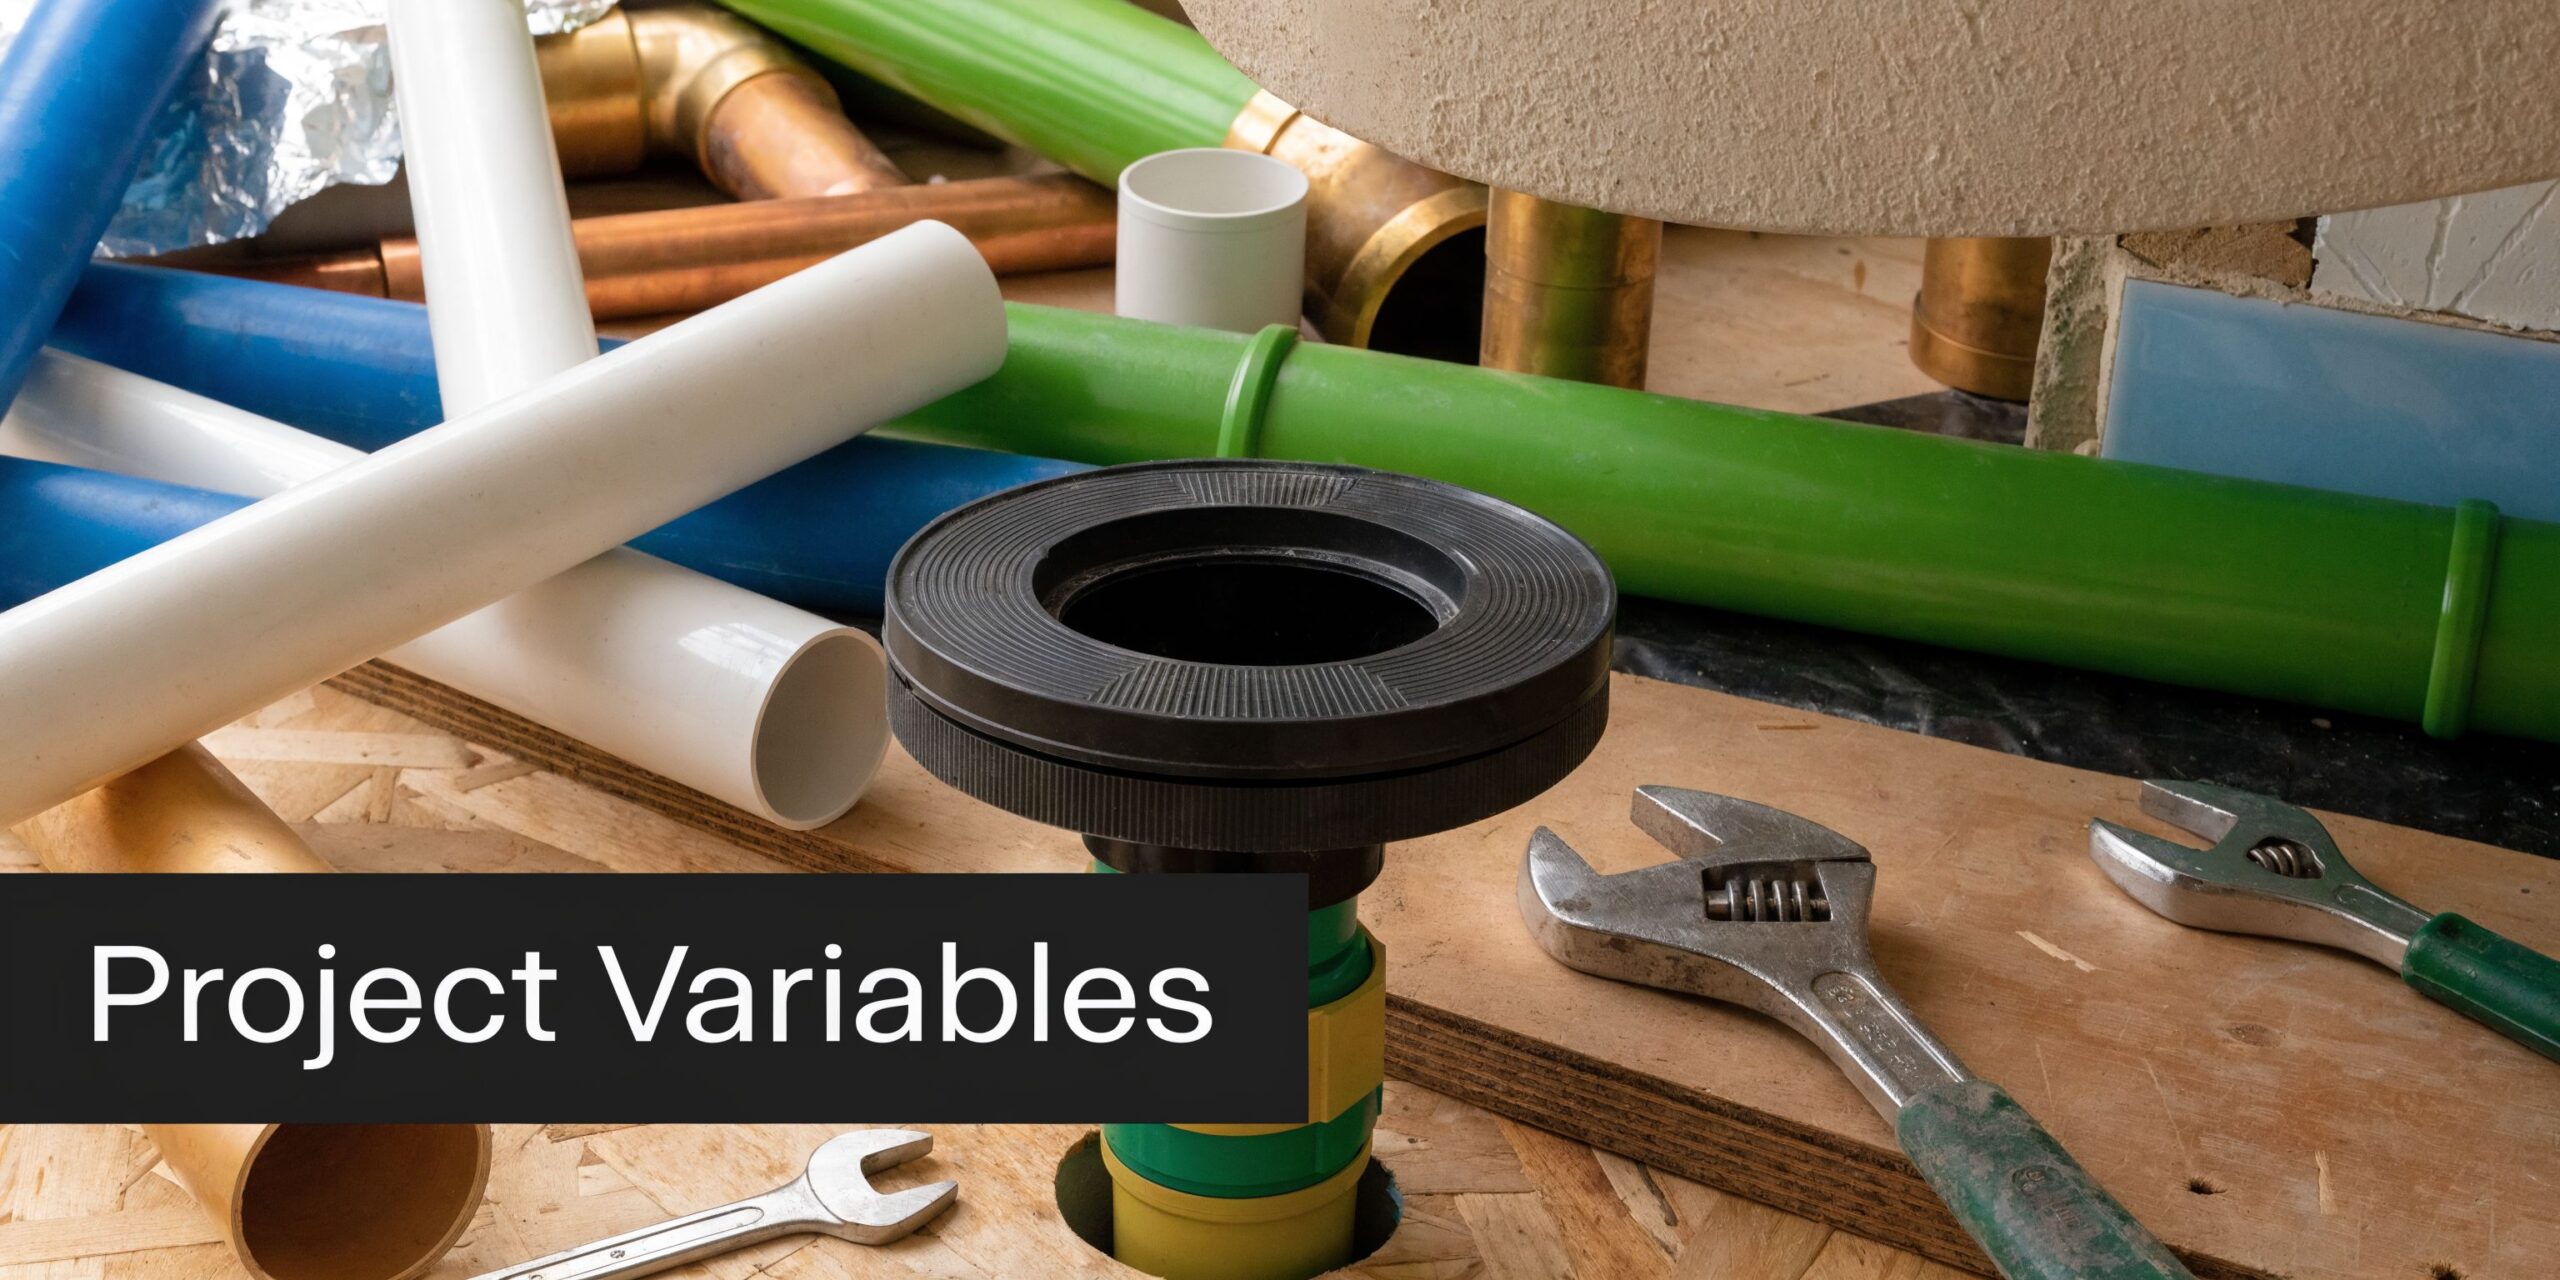
Project Variables That Increase Your Final Bill
A toilet quote stays low when the job is a true remove-and-replace. The bill rises fast when the installer finds conditions that were hidden by the old fixture, or when the new toilet changes the plumbing requirements.
One national cost guide from This Old House places standard replacements in the mid-hundreds when plumbing is already in place, with higher costs for upper-floor work, basement conditions, new drain runs, sewage ejector pumps, and specialty toilet types such as pressure-assisted or macerating units (This Old House new toilet cost guide). That range is useful as a benchmark, but the primary budget question is simpler: are you swapping a fixture, or correcting a bathroom assembly that has been failing for years?
Location changes the labor
The same toilet can cost very different amounts to install depending on where it sits.
Ground-floor replacements are usually the cleanest jobs. Access is easier, the drain path is often simpler, and the work tends to stay limited to the fixture itself. Upper-floor bathrooms leave less room for error. If the flange height is off, the floor is uneven, or drainage pitch is marginal, a small install can turn into a repair job with finish protection and more labor.
Basement bathrooms deserve a separate conversation. If rough plumbing is already there and working properly, the cost may stay close to a standard install. If waste has to be pumped or new drain lines have to be added, the toilet is only one part of the price.
| Installation situation | Typical cost |
|---|---|
| Ground floor with existing plumbing | $350 to $500 |
| Upper floor replacement | $400 to $550 |
| Basement with plumbing in place | $375 to $525 |
| New bathroom with new drainpipe runs | $3,000 to $5,000 |
Those numbers help set expectations, but they do not remove jobsite risk. That is why we scope bathroom work by condition, not by fixture count alone. SouthRay’s package pricing and 3D previews help homeowners see whether they are buying a straightforward swap or stepping into a wider plumbing and finish correction.
Toilet type changes the scope
Fixture selection affects labor more than many homeowners expect.
A basic floor-mounted gravity toilet is usually the least complicated option. Dual-flush, pressure-assisted, and upflush units can add cost through setup, clearance needs, or supporting equipment. Wall-hung and in-wall systems go further. They often require framing changes, carrier support, precise rough-in work, and tighter coordination with tile and wall finishes.
That trade-off can be worth it. A wall-hung toilet can make a small bath feel larger and simplify floor cleaning. It also creates less tolerance for rough framing errors and usually costs more to repair later if something behind the wall was missed.
If the work expands beyond a simple swap, permit requirements may also enter the budget. Homeowners planning a larger bath update should review building permit cost considerations for plumbing and remodeling work before locking in the total number.
Hidden conditions under the toilet
Budgets often increase significantly at this stage.
The old toilet hides the flange, part of the finished floor, and the condition of the subfloor directly around the drain. No honest contractor can confirm those conditions until the fixture is up. Experienced installers can spot warning signs before demo, but they still cannot promise the floor is solid or the flange is sound without opening it.
Watch for these clues before you request estimates:
- A rocking base: often points to a bad flange, a poor shim fix, or floor movement
- Staining at the toilet footprint: can mean the wax seal has been leaking for a while
- Soft flooring nearby: often signals moisture damage below the visible finish
- An old or seized shutoff valve: may force replacement during the install
- A toilet that never flushed right: can point to alignment or drain issues, not just a weak fixture
In older homes, I treat wobble and staining as budget warnings, not cosmetic defects. If the flange is cracked or sitting too low after new flooring was added, the proper repair is to correct the flange height and reseat the toilet correctly. Tightening bolts on a bad setup only hides the problem for a while.
Drain alignment is another hidden cost driver. Pre-install scoping can catch offsets or other issues before the new toilet goes in, which is one reason professional installation reduces the odds of paying twice for the same bathroom.
Accessibility and specialty upgrades
Some added costs solve daily-use problems, not construction defects.
Comfort-height toilets, one-piece models, offset flanges, and layout adjustments can improve accessibility and help an aging-in-place plan work better. The right choice depends on the user, the clearances in the room, and whether the bathroom already feels cramped. A cheaper toilet that is awkward to use is not really the lower-cost option if the room has to be redone later.
This is also where DIY math often breaks down. Homeowners usually price the toilet and a wax ring. Professionals price the full risk: valve failure, flange correction, floor repair, hauling, reset time, and the cost of getting one-shot alignment right on finish flooring. SouthRay reduces that uncertainty by showing scope clearly up front, with package pricing and 3D previews that help homeowners understand what is included before demolition starts.
How Long Does a Toilet Installation Take
Time matters almost as much as price, especially if the bathroom is your main one.
For a normal replacement, professional toilet installation typically takes 1 to 3 hours according to the labor guidance in the Homewyse-based January 2026 data provided for this article. That same source places labor at $150 to $400 for the job, which fits the standard remove-and-replace scenario when no demolition or relocation is involved.
A clean timeline usually looks like this:
- The old toilet is shut off, drained, and removed.
- The flange area is checked and cleaned.
- The new toilet is set, connected, tested, and sealed.
- The installer checks for leaks and confirms flush performance.
That quick schedule only holds when the floor is solid, the flange is sound, the shutoff valve works, and the new toilet matches the existing rough-in.
If the installer finds a broken flange, soft subfloor, stubborn valve, tile interference, or a need to move the drain, the job can stretch well beyond the standard window. At that point, the toilet itself is no longer the whole project. The plumbing correction or finish repair becomes the schedule driver.
For homeowners, the practical question is simple. Is this a same-day swap, or are you opening up the floor? Once floors, framing, or drain location enter the picture, plan for a longer disruption and make sure someone is coordinating the sequence so the bathroom does not stay offline longer than necessary.
DIY Installation vs Hiring a Professional Plumber
A toilet swap looks easy until the old fixture comes up and the flange is cracked, the shutoff will not close fully, or the floor around the base is soft from a leak that never showed on the surface.
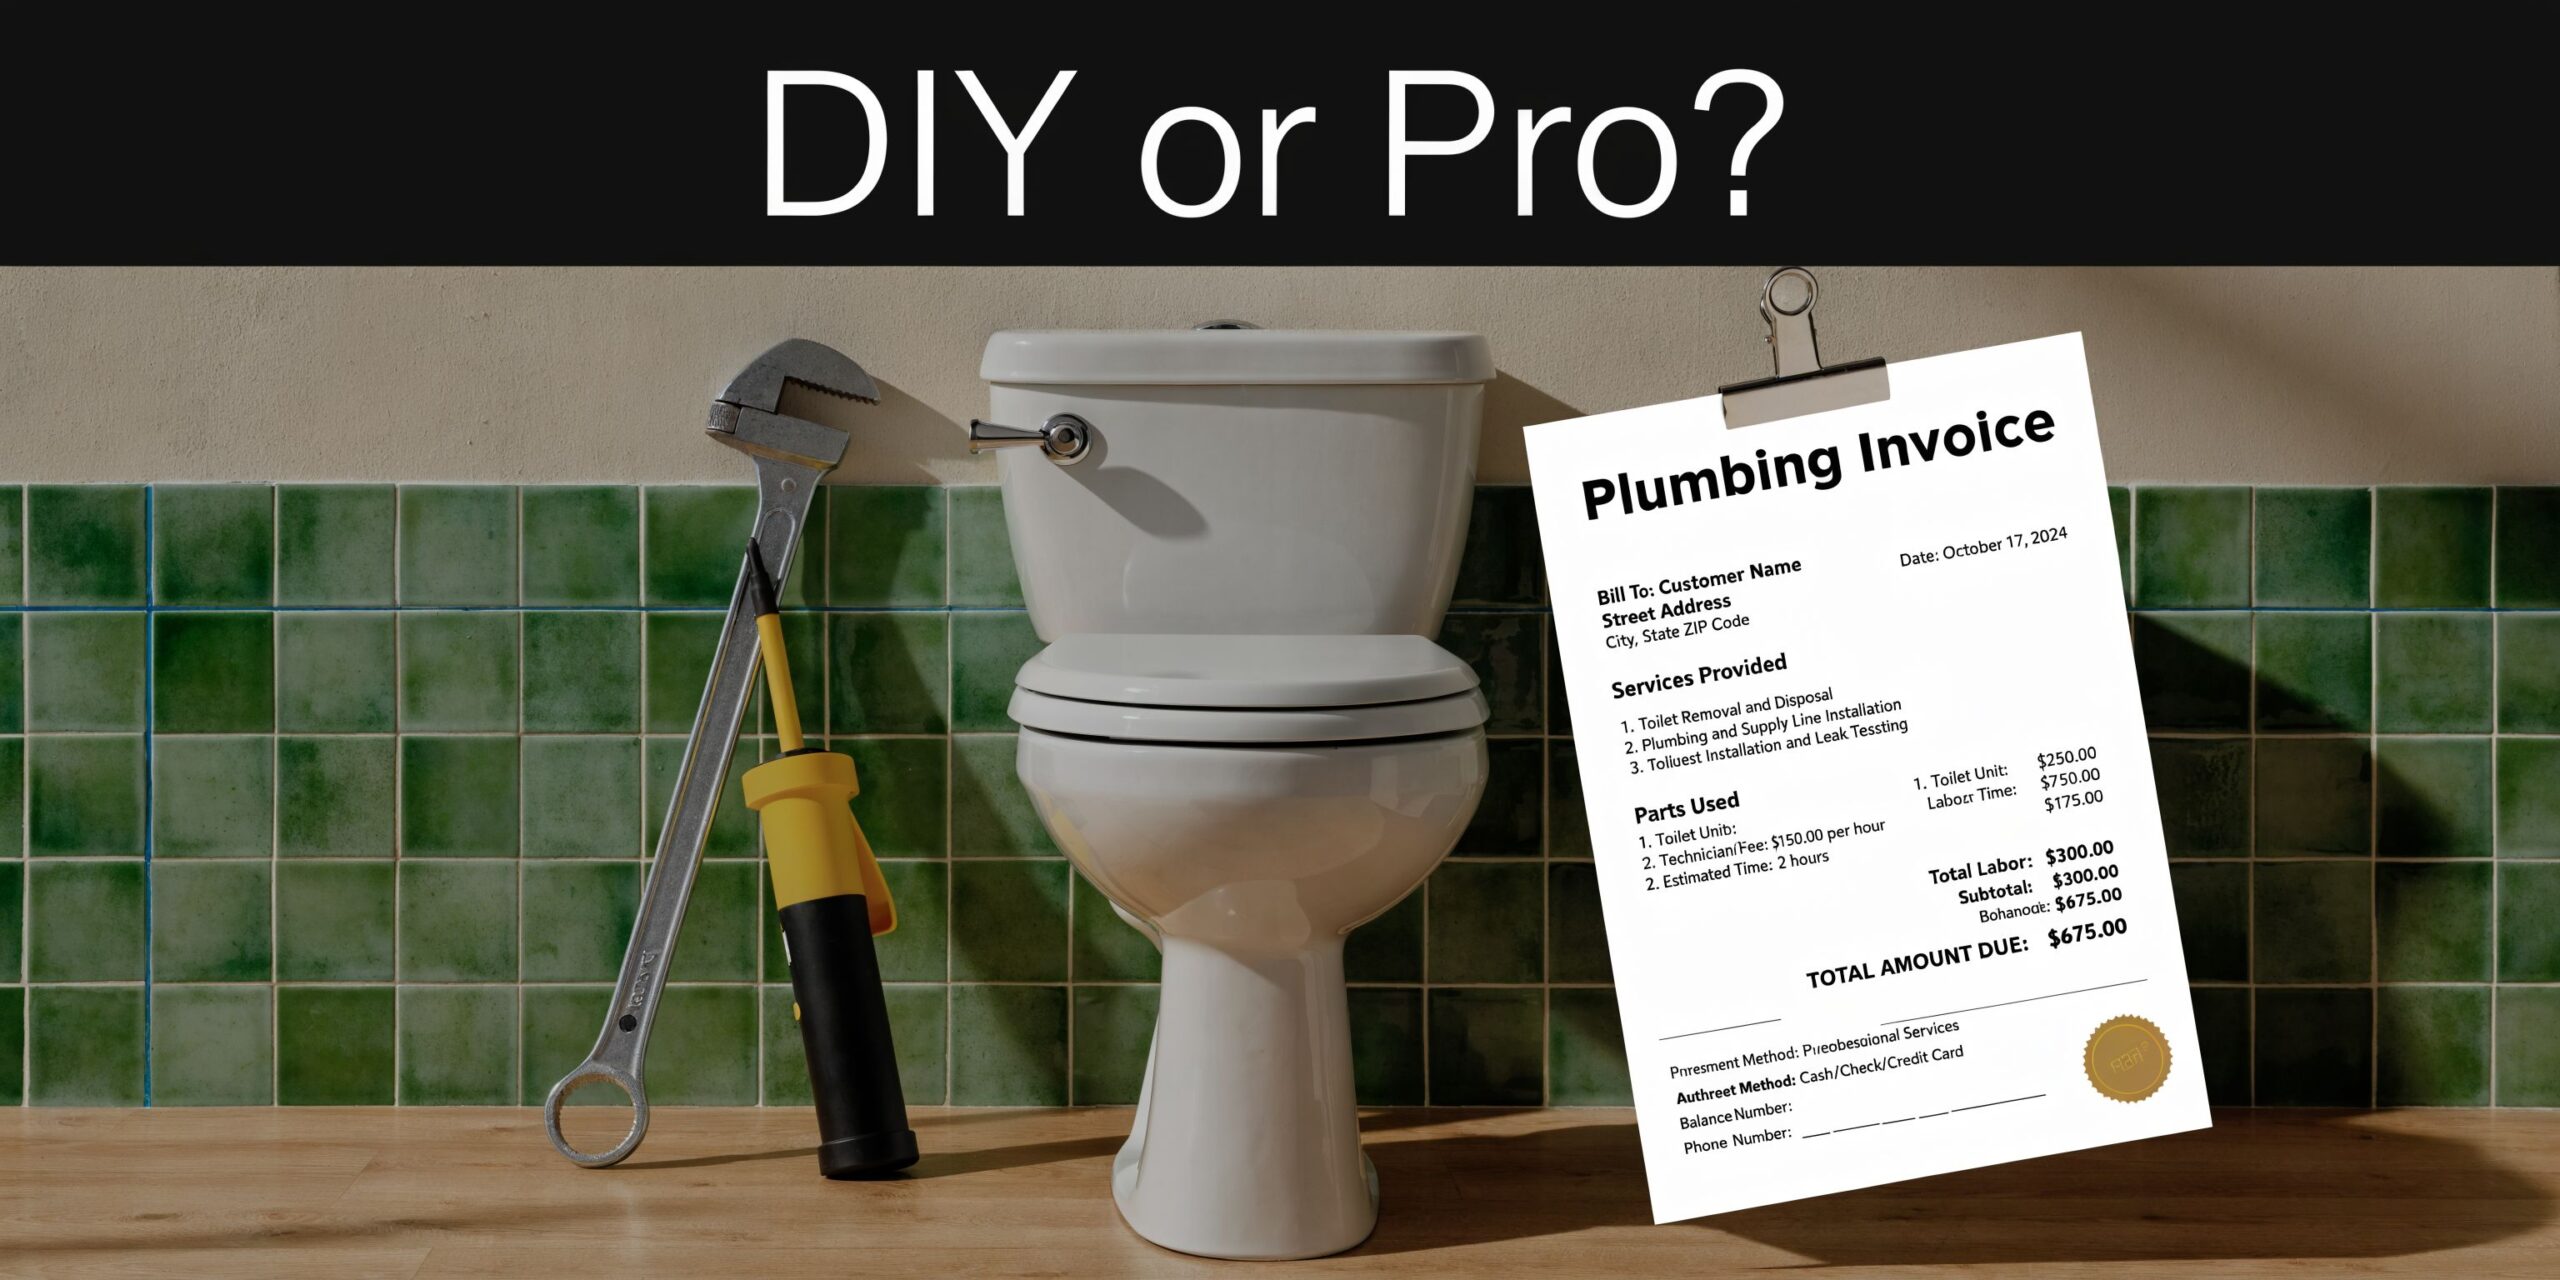
That is the fundamental decision. It is not only labor versus no labor. It is predictable cost versus risk that may stay hidden until the repair bill is much larger than the original install.
The January 2026 Homewyse guidance used for this article puts professional labor for a standard toilet installation at $150 to $400, with total project costs often falling in the $635 to $1,151 per toilet range depending on materials and site conditions. The same guidance also notes lower failure rates with professional installation, added labor in older retrofit conditions, and much higher costs once drain relocation or specialty systems enter the scope (Homewyse toilet installation cost guide).
For a straightforward bathroom with a sound flange, working shutoff valve, correct rough-in, and no floor damage, DIY can save money. If all you are doing is removing one toilet and setting another in the same spot, the labor line is the part you can avoid.
What homeowners often miss is the cost of getting one small detail wrong. A poorly seated wax ring, a loose closet bolt, or an out-of-level base can create a slow leak that does not show up right away. In our work, that is where the budget usually gets blown. Not on the toilet, but on the flooring, subfloor, drywall below, or the second visit to diagnose what happened.
Here is the practical trade-off:
| Decision | Upfront cost | Risk profile |
|---|---|---|
| DIY install | Lower if conditions are simple | Higher chance of hidden leaks, fit issues, or damage during removal and reset |
| Professional install | Higher at the start | Better testing, clearer accountability, and fewer surprise corrections later |
Older homes shift the math further toward hiring a plumber. Retrofits often involve offset drains, aging shutoff valves, flange height problems after new flooring, or previous repairs that were never done cleanly. Wall-mounted units and any job that requires moving the drain are in a different category altogether. Those are plumbing modification projects, not basic fixture swaps.
This quick visual walk-through can help you see what the work involves before deciding whether to do it yourself.
Homeowners usually ask me one question first. “Can I do this myself?” The better question is, “What happens if this bathroom is not as simple as it looks?”
If you want the lowest possible upfront number and you are confident the room is straightforward, DIY may be reasonable. If you want cost certainty, a tested installation, and less chance of paying twice, professional installation is usually the better buy. That is also why SouthRay builds toilet work into clear packages and 3D previews when a bathroom update is part of a larger remodel. Homeowners can see the scope, understand the allowances, and make decisions before hidden conditions turn a basic toilet replacement into an open-ended project.
Local Toilet Installation Costs in Northern Colorado
Northern Colorado quotes can look similar on paper and still be priced for very different risk.
A direct toilet swap in a newer Windsor or Timnath home often stays near the low end of the local range because the shutoff valve, flange height, and finished floor are usually predictable. The same replacement in a 1970s Fort Collins or central Loveland home may come in higher even with the exact same toilet. Older bathrooms are more likely to hide a weak stop valve, an out-of-level floor, a cast-iron flange issue, or extra flooring layers that changed the toilet height over time.
Here is what that looks like in budgeting terms. A straightforward install in a 2010s-era subdivision home might be quoted around $450 to $600 if the toilet is already on site and the connection points are clean. A similar job in an older Old Town Fort Collins home could reasonably land around $600 to $850 once a plumber allows for valve replacement, flange correction, or minor reset work. If the base has been leaking and the subfloor is soft, the job leaves basic-install territory and the number climbs from there.
Local conditions also affect labor planning. Fort Collins and Loveland homes with tight hall baths, second-floor bathrooms, or occupied remodel conditions usually take more care than a first-floor powder room in a newer tract home. Snow-season scheduling, longer parts runs for older rough-ins, and permit coordination for related plumbing corrections can also push pricing upward.
The biggest local cost drivers are usually:
- Age of the home: Pre-1990 homes are more likely to have worn valves, flange damage, uneven floors, or repairs from earlier remodels.
- Neighborhood housing type: Older cores in Fort Collins and Loveland tend to carry more unknowns than newer homes in Windsor, Timnath, or Severance.
- Bathroom location and access: Upstairs bathrooms, narrow doorways, and small tile rooms slow removal and reset work.
- What happened before you called: A rocking toilet, a leak at the base, or recent flooring replacement often means correction work is already part of the job.
- Whether the quote is complete: Haul-away, supply line replacement, disposal fees, and contingency language change the actual cost.
Homebuyers run into this all the time before move-in. A toilet replacement gets grouped with easy cosmetic work, then the plumber pulls the fixture and finds the flange sitting below the finished tile or the shutoff no longer closes fully. That is why I tell clients to separate "fixture cost" from "installation risk" when building a bathroom budget. If the toilet update is tied to a broader plan, a clear scope and visual plan help prevent piecemeal decisions. SouthRay handles that with transparent packages and 3D previews, which is the same planning approach outlined in this bathroom remodel planning guide.
For landlords and property managers, the math is simple. A lower bid is not the better value if it excludes valve replacement, haul-away, or follow-up corrections after a bad seal. The better local quote spells out what is included, what triggers added cost, and who owns the repair if hidden damage shows up once the toilet comes off.
When a New Toilet Is Part of a Bigger Vision
A new toilet can look like a simple fix, but in a lot of bathrooms it is really the first visible sign of a bigger planning problem.
I see this with hall baths and older primary bathrooms all the time. The homeowner starts by pricing a toilet replacement, then realizes the floor is soft near the flange, the vanity crowds the walkway, the lighting is poor, or the room no longer works for aging parents, growing kids, or long-term resale. At that point, a one-fixture update can turn into money spent twice.
A larger remodel usually deserves a closer look when the bathroom has multiple friction points, not just one:
Signs a simple swap may not be enough
- The toilet height no longer fits the people using it: Comfort, accessibility, and future mobility needs affect the right fixture choice.
- The floor around the base shows staining, movement, or damage: Repair work can extend into subfloor, tile, or trim.
- The room feels tight even with the right-size fixtures: Layout problems do not get solved by replacing the toilet alone.
- Other fixtures are aging out too: Replacing them in separate phases often adds repeat labor, repeat disruption, and more finish repair.
The cost question changes here. It is no longer just "What does it cost to install a toilet?" It becomes "What work should be grouped together so we do not remove, reset, patch, and pay for the same area twice?"
That is why design planning matters. Seeing the room before construction helps homeowners choose fixture sizes, clearances, flooring transitions, storage, and accessibility details with fewer mid-project changes. If the toilet update may lead to a broader renovation, this guide on how to plan a bathroom remodel is a smart place to start.
Why piecemeal work can cost more
A phased approach can make sense if the budget is tight or the bathroom is still broadly functional. But it carries trade-offs.
Replace the toilet now and the flooring later, and the toilet often has to come back out. Change the vanity later, and you may lose the chance to improve spacing while the room is already open. Add grab bars, blocking, or a wider layout later, and part of the earlier work may need to be revised.
DIY decisions also get riskier once the project touches finishes, layout, or hidden water damage. A basic reset is one thing. Coordinating flange height, finished floor elevation, fixture clearances, and accessibility details inside a remodel is another. The failure cost is usually not the toilet itself. It is the leak, the cracked tile, the damaged subfloor, or the rework after materials are already installed.
Getting a clear quote that accounts for those possibilities is the best way to decide between a simple replacement and a bigger bathroom plan.
If you want that level of clarity before construction starts, SouthRay Kitchen & Bath can help. Their team serves Northern Colorado with transparent package pricing and free 3D previews, so you can compare a stand-alone toilet replacement against a full bathroom update and see the layout before work begins. Learn more at SouthRay Kitchen & Bath.